
A patch has no garment holding it together and an edge that gets cut. That changes the coverage, the border and the base cloth. Here's what to do differently.

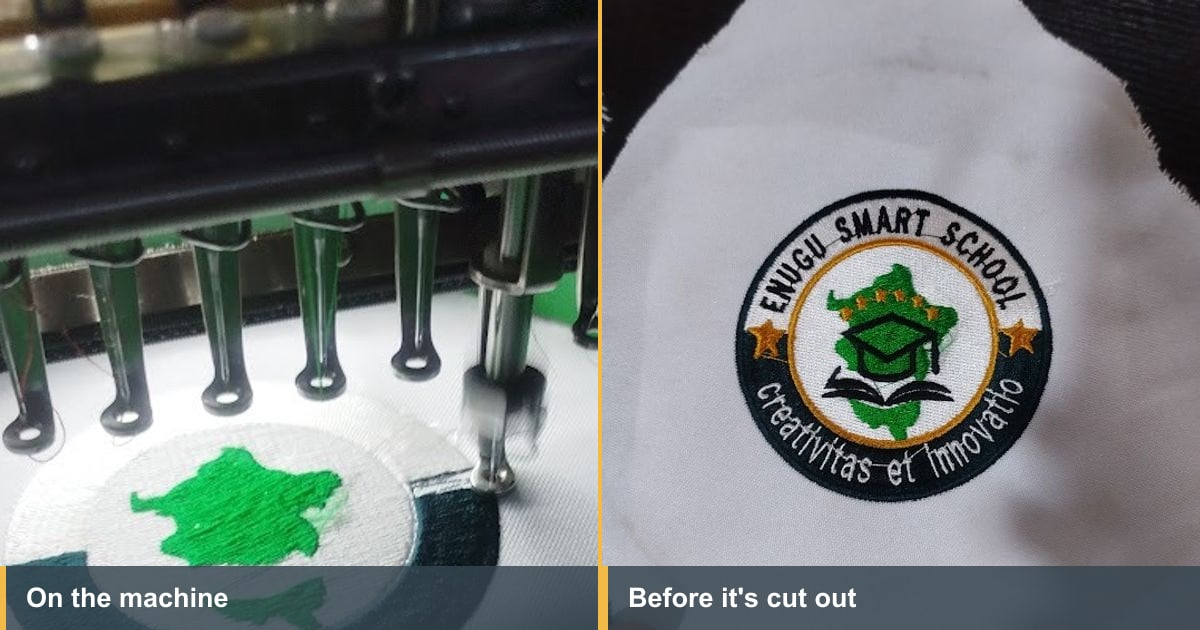
Stitch a logo onto a shirt and the shirt does half the work. It holds the design, it takes the tension, and nobody sees the edges because there aren't any.
A patch has none of that. The cloth it sits on is the product, the design has to hold itself together, and somebody is going to cut round it with a pair of scissors. Embroidered patches are a different job, and the differences are worth knowing before you quote one.
The base is the product. On a garment the fabric belongs to the customer and your job is to decorate it. On a patch the base cloth is something you chose, which means you get to pick one that behaves.
There's an edge. Every patch gets cut out, and a cut edge frays. Finishing that edge is part of the design rather than an afterthought.
Nothing else holds it. Once it's off the backing, the stitching is the structure. A design with gaps in it will distort or come apart in a way the same design never would on a shirt.
Twill is the standard choice, and for good reason. It's tight, stable, doesn't stretch much and cuts cleanly. Felt is the other common one, softer and more forgiving on shape but less crisp at the edge.
Back it heavily. A cut-away behind the base gives the design something to build on and stops the patch curling once it's free. Patches that come out looking like a crisp made object rather than a floppy scrap almost always have proper backing behind them.
One useful trick: if the patch background is a solid color, use colored twill rather than stitching the whole background. You save a great deal of stitch count, the patch stays flexible, and it usually looks better. Only cover the base completely when the design demands it.
Where a garment design leaves fabric showing between elements, a patch usually can't. Any base that shows through needs to be there on purpose, matched to the design, not a gap you forgot about.
So embroidered patches tend to carry a higher stitch count for their size than the same design on a shirt would. That's normal and worth pricing in. Our guide to how many stitches a design should have covers judging a count against the job rather than against a rule.
What doesn't change is density. Piling thread on to force coverage makes a stiff patch that won't sit flat on a sleeve. Coverage comes from underlay and sensible planning, not from tightening everything.
This is where patch work is won or lost, because the border does two jobs at once: it finishes the design and it hides the cut edge.
A satin border is stitched as part of the design, a solid column running right round the outline. Keep it wide enough to cover the cut, usually somewhere around 2 to 3mm. Any thinner and a slightly wobbly cut will show base cloth outside the border, which looks careless even when the embroidery is good.
A merrowed edge is the classic raised rope finish, added on a separate overlock machine after the patch is cut. It gives that traditional badge look and covers the edge completely, but it only works on simple outlines: circles, shields, rectangles, ovals.
The shape decides which you can have. A complicated outline with fingers and notches can't be merrowed, so it needs a satin border and careful cutting. That's a design conversation to have early rather than a discovery at production.
The single most useful piece of advice on patches: the simpler the outline, the better the patch, at every stage.
Simple shapes stitch cleanly, cut accurately, merrow properly, and lie flat. Complicated ones fight you in all four. Where a logo has an intricate silhouette, the usual answer is to put it inside a simple shape rather than cutting round the logo itself, and that nearly always looks more deliberate too.
Worth knowing, because clients often ask for one when the other suits them better.
Patches win when the garment is difficult. Waterproofs and technical jackets you'd rather not put a needle through, bags with linings you can't hoop, and anything already made up where there's no way to get the hoop round the panel. They also win on runs of mixed garments, because one batch of badges covers shirts, caps and jackets that would otherwise need three different files.
And they win when the design changes. A club that updates its badge every few seasons replaces patches rather than garments.
Stitching direct wins on cost per piece for a straightforward garment, and it looks more integrated. Neither is better in general. The question is what the garment allows.
Worth agreeing before you make them, because it affects what you produce.
None of these change the digitizing much, but they change the quote and the lead time, so ask at the start.
Patches are made in batches, which is the other way they differ from garment work.
You'll usually gang several into one hoop rather than hooping each one. That means planning the sequence across the whole hoop, not just within one badge, so the machine isn't jumping back and forth across the frame all day. On a long run that ordering is worth real minutes per hoop.
Cut them out with sharp scissors for small runs. Larger runs are worth cutting with a hot knife or having them cut professionally, because the heat seals synthetic twill as it cuts and the edges stop fraying entirely.
Most of those are visible on the first one off the machine, which is the argument for making one before making two hundred. There's more on reading a bad result in why an embroidery design went wrong.
Patches surprise people on cost because the digitizing is comparable to a logo but the production is a separate operation: base cloth, backing, cutting, and finishing the edge.
Price the making, not just the stitching. And because the same patch design gets reordered for years, it's worth keeping the file, the thread numbers, the base color and the cut size with the client record rather than in someone's memory, which is what EMBBA is for.
Patch work is a good line to be in. Schools, clubs, churches, associations and uniform suppliers all reorder, and once your badge is on the blazer it stays there for years.
The skills are the ordinary ones applied a little differently: coverage, underlay, border width and knowing what a shape will do when it's cut. Our Digitizing Mastery course teaches that reasoning rather than a set of presets. And for designs that aren't a client's own badge, EmbGig has machine-ready files from digitizers who actually stitch.
Twill for most work, because it's stable and cuts cleanly. Felt where you want a softer look. Either way, back it with a heavy cut-away.
A satin border is stitched as part of the design on the machine. A merrowed edge is an overlocked rope finish added afterwards on a separate machine, and it only suits simple outlines.
The border sets the floor. Once the satin edge takes up most of the badge there's no room left for a design, so very small patches end up being a shape and a letter rather than a logo.
Usually not per piece, because you're paying for the base cloth, the cutting and the edge finishing on top of the stitching. They earn their keep on awkward garments and on mixed orders, not on price.
No. It's the same digitizing, with different decisions about coverage and the border. What you may need is a way to cut them cleanly at volume.
Embroidered patches need full, deliberate coverage, a border wide enough to hide the cut, a stable base cloth with proper backing, and the simplest outline you can talk the client into. Get those four right and the rest is ordinary digitizing.
The Academy turns articles like this into proper courses, with video lessons, assessments, and people to learn alongside.